
Duct Tape Dummy Tutorial
Disclaimer
Duct tape dummies are not for everyone. Some people may find it too constricting, uncomfortable, and the fumes that come off the tape can be unpleasant. It’s okay to back out, you’re health and comfort is the most important thing.
Attention!
If you do not tape your dummy together, a $100 taping fee will be applied to the previously quoted estimate.
Helpful hints!
Have two people helping you. One person can cut the tape while the other person is applying the tape. This will cut your time in half. Always go to the bathroom before you start making a duct tape dummy. If you are making this for your own use, you will have to tape up the wrists and ankles to contain the stuffing. Any number of materials can be used to stuff your dummy such as scrap foam, newspaper, fiber fill, to name a few. Get creative, just don’t pack it too tight or the seams may pop over time. Keep a camera handy, photos are always fun. Most importantly, have fun!
Preparation

You will need a pair of inexpensive painters coveralls, duct tape (2 to 3 rolls depending on the length) two different coloured permanent markers, safety scissors (or small scissors and a steady hand), and a few friends! Be sure you have an hour or more of working time set aside. It’s a good idea to use the washroom before starting. Have a fan on hand to help keep you cool and comfortable.
Step 1
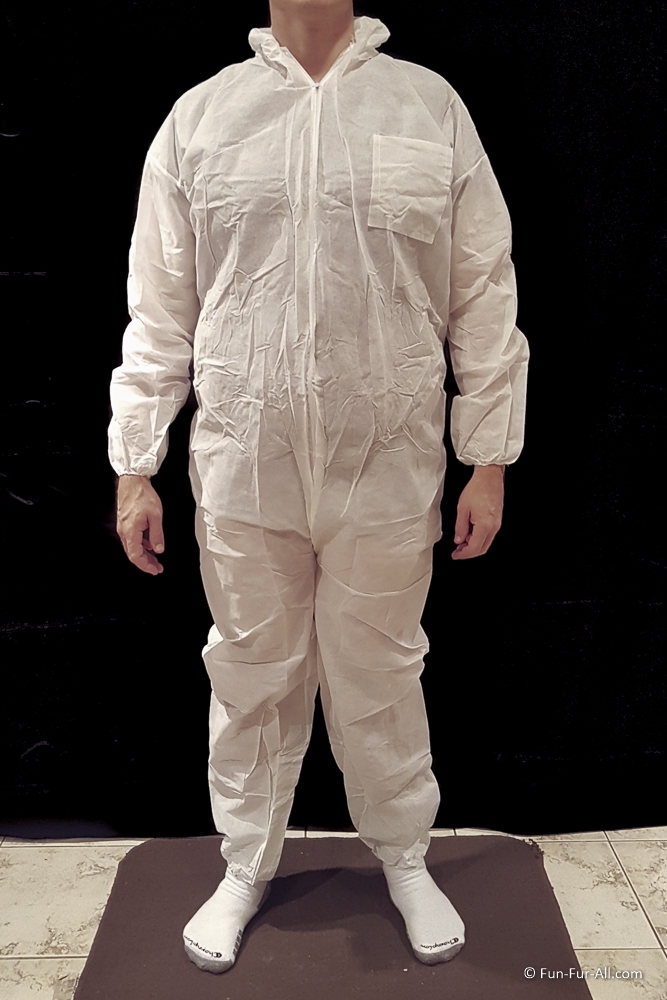
Wear old clothes (you won’t mind being accidentally cut) under the coveralls, a t-shirt and shorts will be adequate. The clothing will help protect the skin from the scissors. Don’t worry about the small amount bulk the clothing adds, it won’t affect the dummy’s final shape.
Step 2

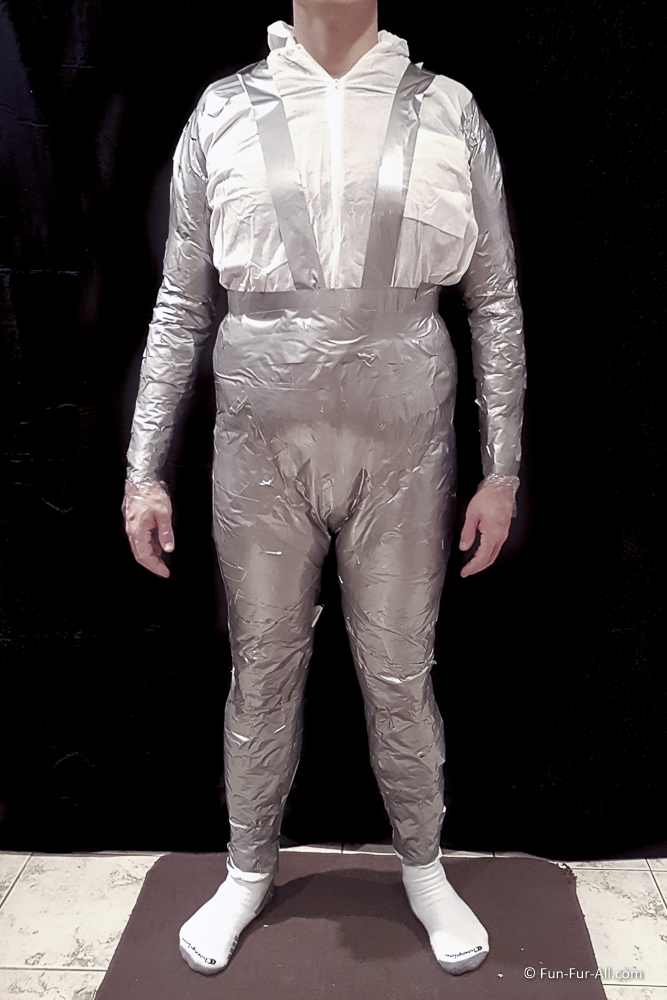
Start by taping the wrists, ankles, waist, and armpits. Next tape the torso, run tape from one shoulder down the chest, between the legs, and back up to the same shoulder. Repeat on the other side. This initial taping will help keep the coveralls in place and prevents shifting while making the dummy.
Step 3A
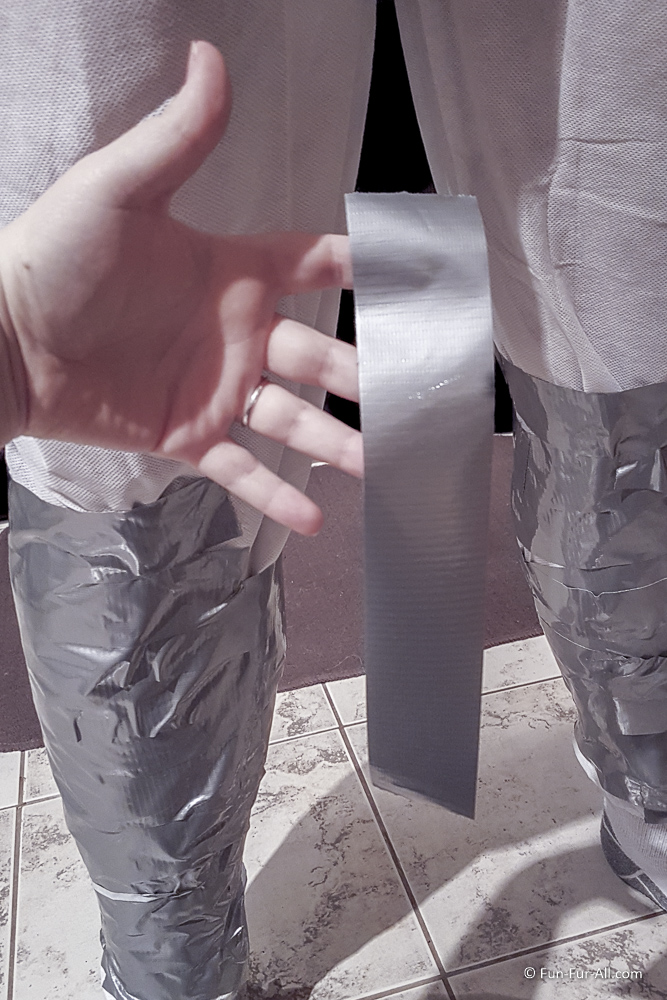
Using smaller pieces of tape, apply strips horizontally, starting at the ankles and moving upwards. This process is much faster with two people, one person cutting the tape and the other one applying it.
Step 3B
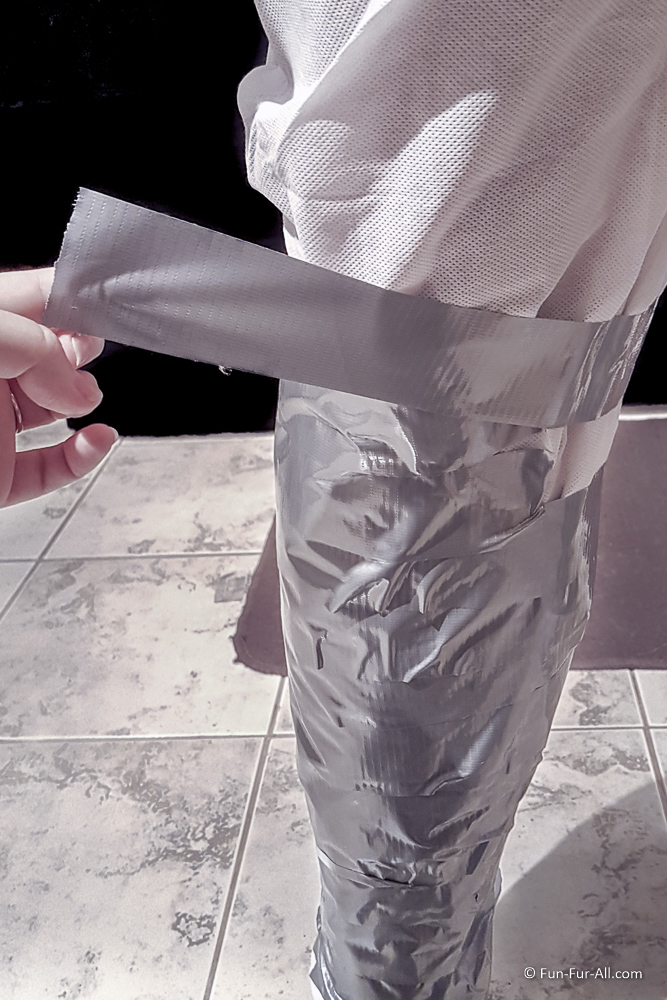
Fold the coveralls over, but not too tightly. Gently pat the tape down, do not pull it tight. You should be able to fit a single finger between the taped suit and the body, or be able to grab the taped suit and shift it slightly from side to side.
Step 4
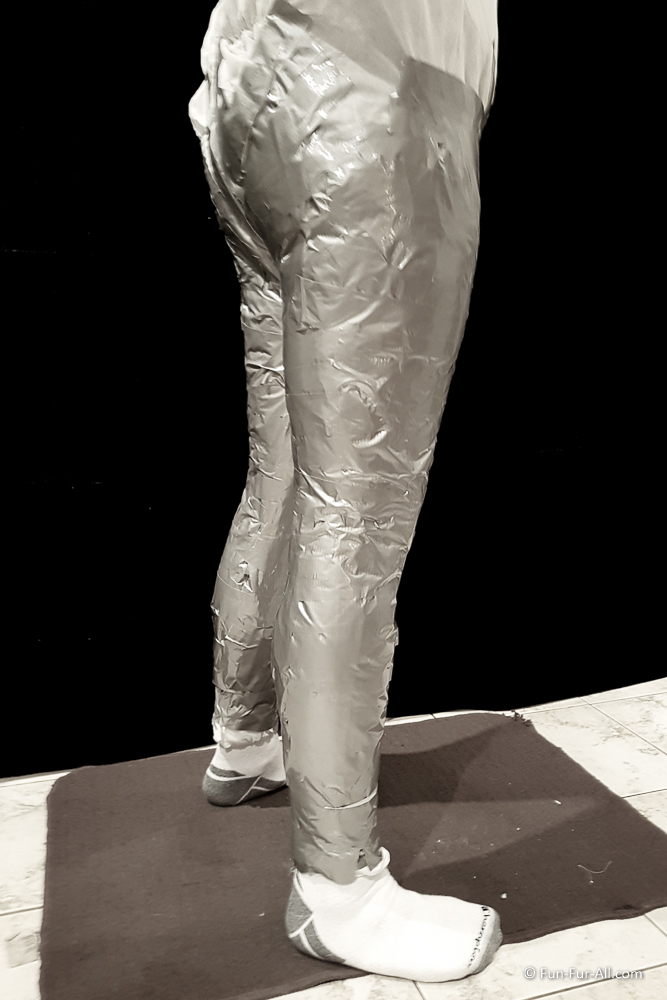
After completing the first leg, repeat with the other leg, continuing up over the butt. Ensure the person being taped is comfortable. They should be able to bend their knees a bit, but not be able to do a full squat.
Step 5A

Wrap the arms using the same method as the legs. Apply smaller pieces of tape around the arm, starting from wrist and moving up to the shoulder. As you approach the shoulder, keep the arms slightly away from the body. Use a chair or shelf to rest the arms on while taping the armpits and shoulders.
Step 5B
Once both arms and legs taped, double-check the comfort of the person being taped to ensure they are prepared to continue with the final steps. At this point it is still feasible to abort the dummy mission and remove it, if needed.
Step 6
Cut slightly longer pieces of tape and wrap around the torso. Apply from the front to back, making sure to cover any gaps. Do not wrap tape all the way around the body in a single piece. Ensure the tape is snug, but not squeezing the breath out of the person being taped. They should still be able to breathe comfortably. If they feel it’s too tight in any area, stop and cut a few pieces of tape, and re-apply looser.
Step 7

Once the body is completely covered in tape, you’ll want to work quickly. Check in with the person being taped to ensure they are comfortable and willing to continue.
Step 8A

Gently bend the elbow to make a crease.
Step 8B

Straighten the arm and draw a line all the way around the elbow using the crease as a guide line.
Step 8C
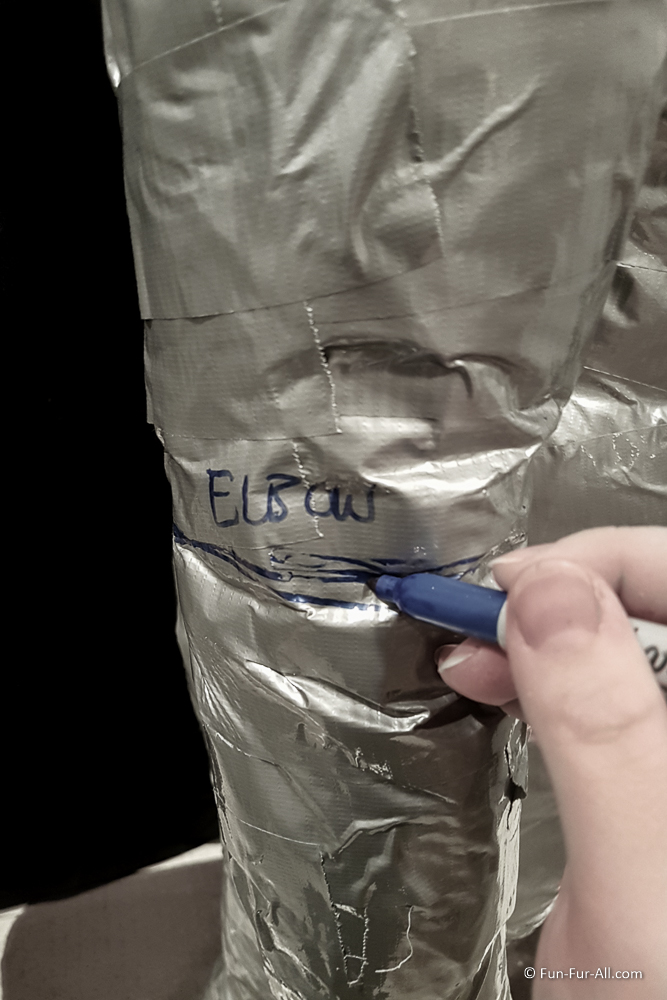
Label the line as “elbow”.
Step 9A
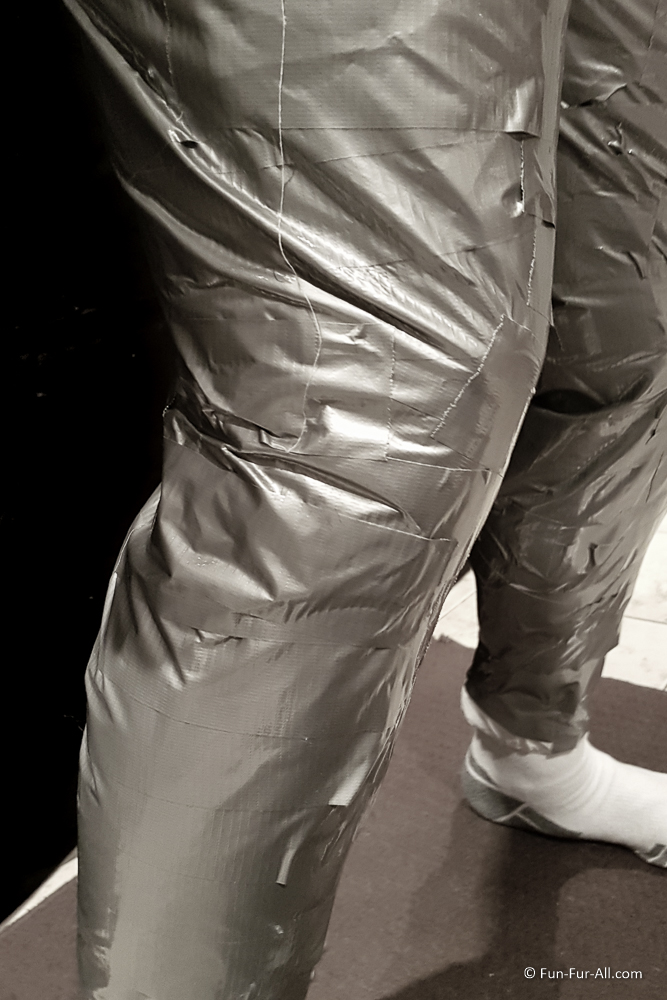
Gently bend your knee to make a crease.
Step 9B

Straighten the leg and draw a line all the way around the knee using the crease as a guide line. Label the line as “knee”.
Step 10
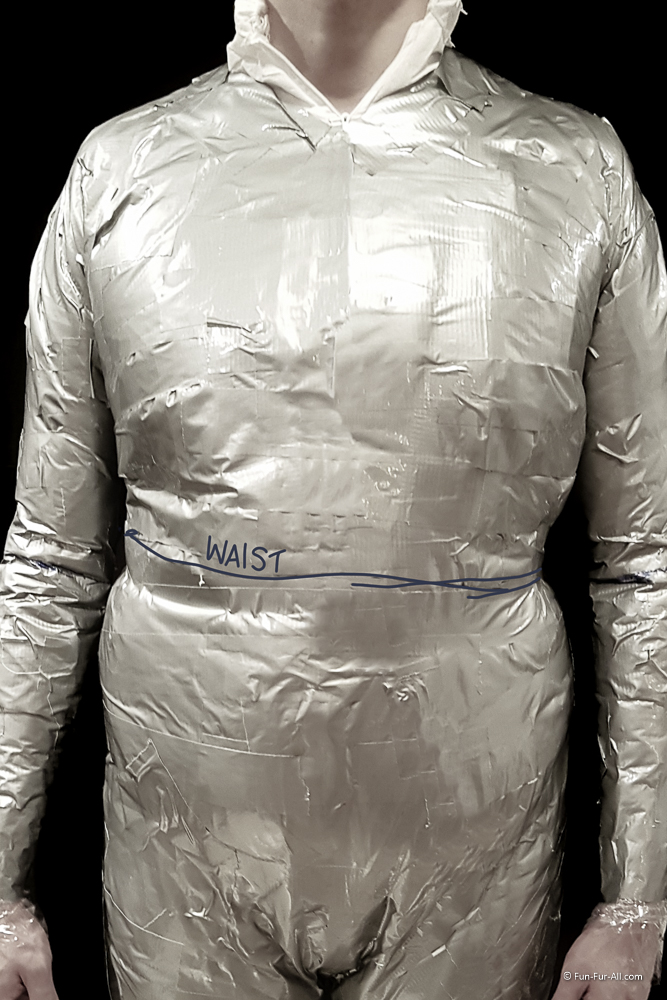
Repeat the steps for marking the elbows and knees, to mark the waist.
Step 11A

Using a different coloured permanent marker (not the same one used for marking the elbows, knees and waist), draw the line where you will cut and free the person from the taped suit. You can cut the suit any way you’d like, you will tape up the cuts before mailing it.
Step 11B

Draw a liberal amount of “registration marks” before you cut. These smaller horizontal marks are used to help align the cut pieces to ensure a perfect match. (Do not miss this step, trust me.)
Step 12
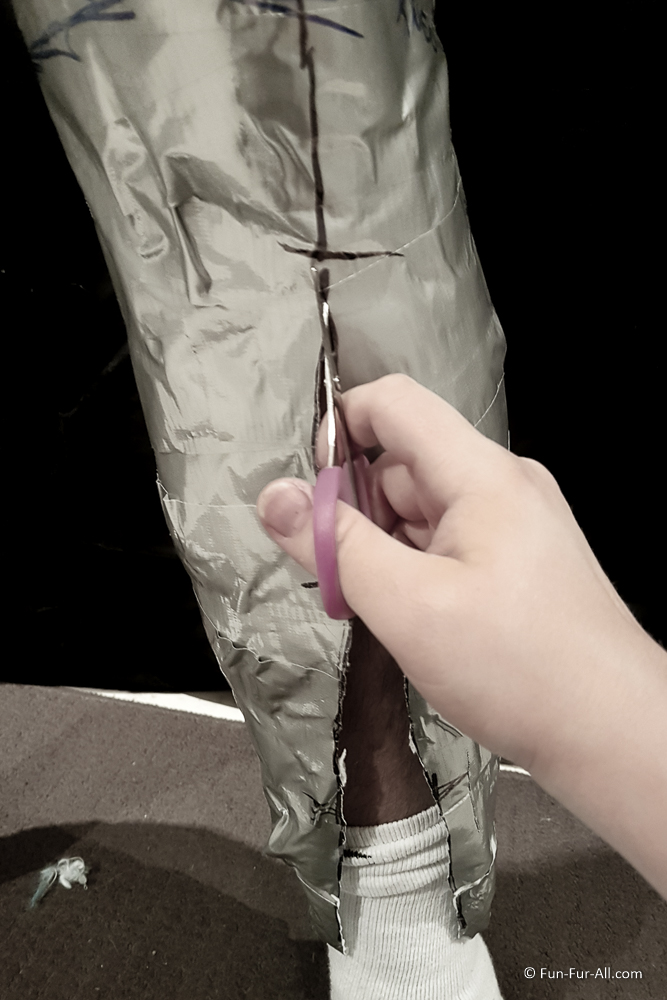
Using a very steady hand, carefully cut the suit following the drawn line. If you need some wiggle room, you can slide a finger under the taped coveralls to help pull the suit away from the body and make more room for the scissors. If you are able to wiggle free from the suit without completely cutting the line, do it. This will make the taping up process much easier. Cut a little bit, then wiggle and see if you can squeeze out, cut a bit more and try to shimmy out.
Step 13A

Carefully line up the registration marks on the cut dummy. Use smaller pieces of duct tape to tape the dummy back together.
If you do not tape your dummy together, a $100 taping fee will be applied to the previously quoted estimate.
Step 13B
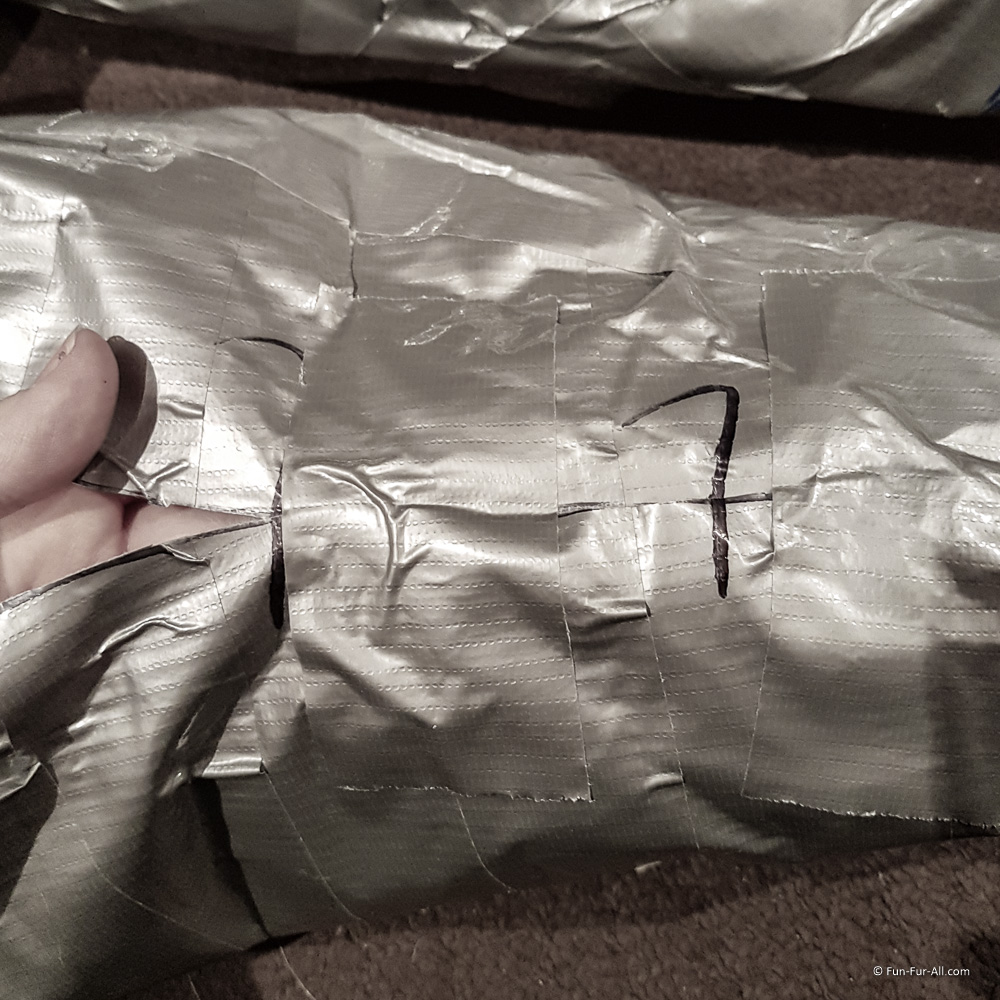
If any elbow, knee, or waist lines were taped over, simply re-mark them.
Step 14

Check the front and back of the dummy for any parts where the coveralls may be peeking through, patch them up. Write your character’s name on the chest to identify the suit.
Step 15
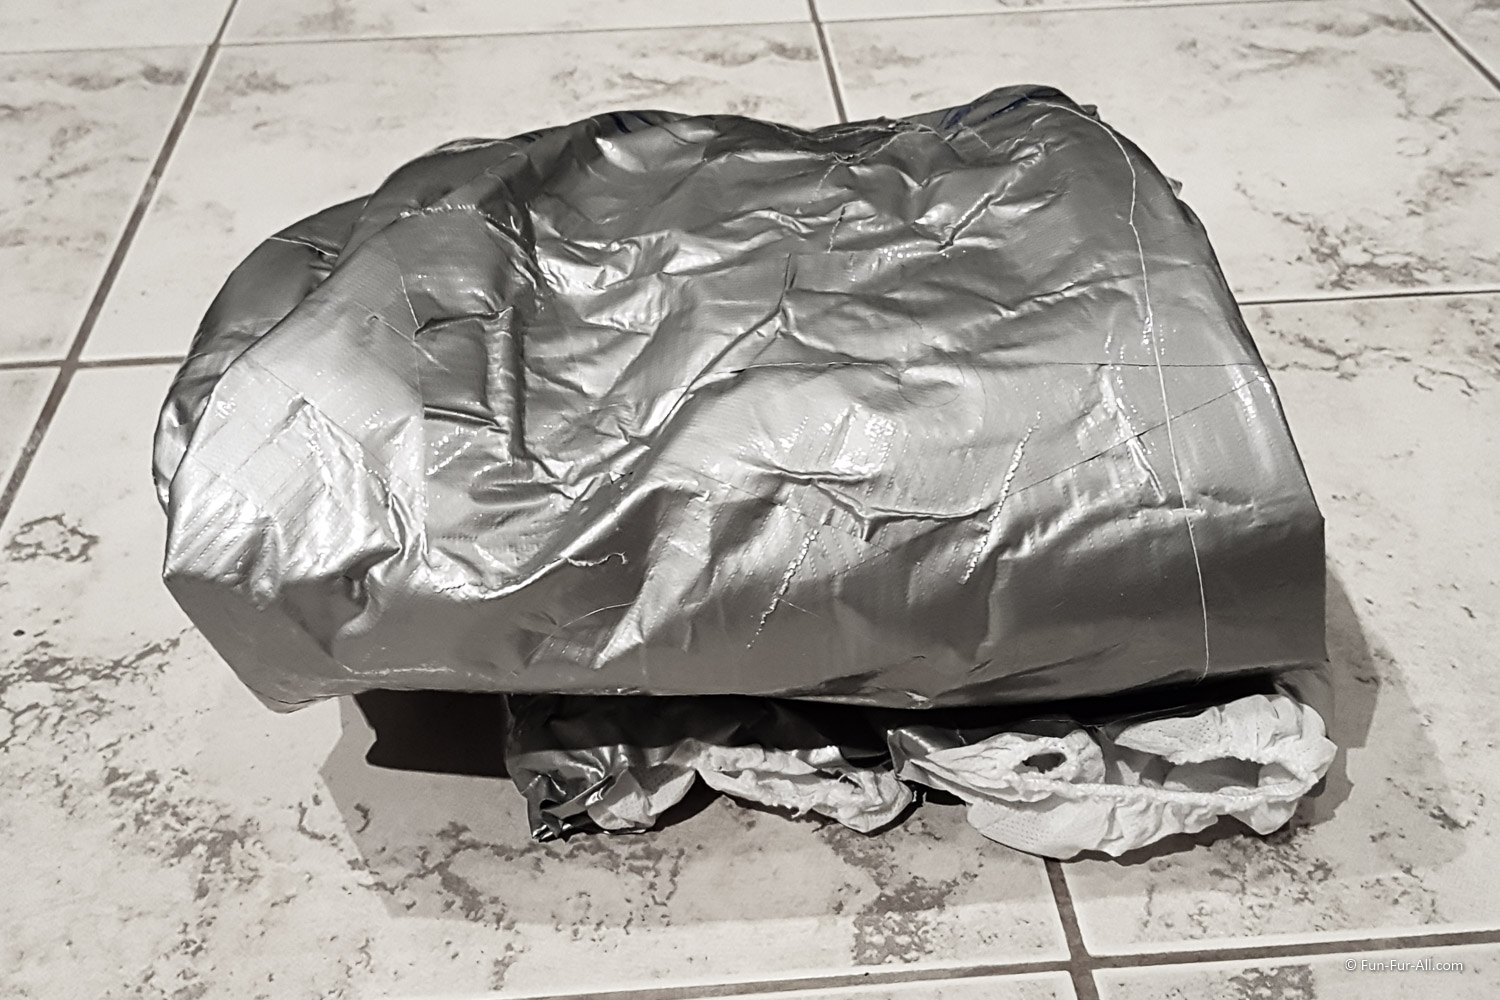
Fold the dummy in half, take the arms and fold them back over the body, then starting from the ankles roll the dummy up and onto itself so you end up with something that looks somewhat uniform and flat. You can now squeeze it into a box or bubble envelope and pop it in the mail!